
USB-CAN Tool User Guide
USB-CAN Tool is the Windows debugging utility for CANalyst-Ⅱ interfaces, used to configure dual Classic CAN channels, transmit and receive Classic CAN frames, and save communication logs. Follow this guide to connect a CANmeleon device running CANalyst-Ⅱ firmware and verify dual-channel communication.
Switch Modes via Firmware, Not DLL Replacement
Although standalone CANalyst-Ⅱ packages sometimes swap ControlCAN.dll variants to emulate USBCAN-II behavior, CANmeleon devices support switching directly to the corresponding firmware in CANmeleon device manager. Keep the original DLL shipped with USB-CAN Tool.
Prerequisites
Before starting, confirm that:
- You completed CANalyst-Ⅱ Windows Driver Setup and Windows Device Manager shows no warning icons.
- You downloaded USB-CAN Tool from the Chuangxin resource download center (Chinese).
CAN_HandCAN_Lare wired properly, with a 120 Ω termination resistor at each end of the CAN bus.
Connect and Start the Device
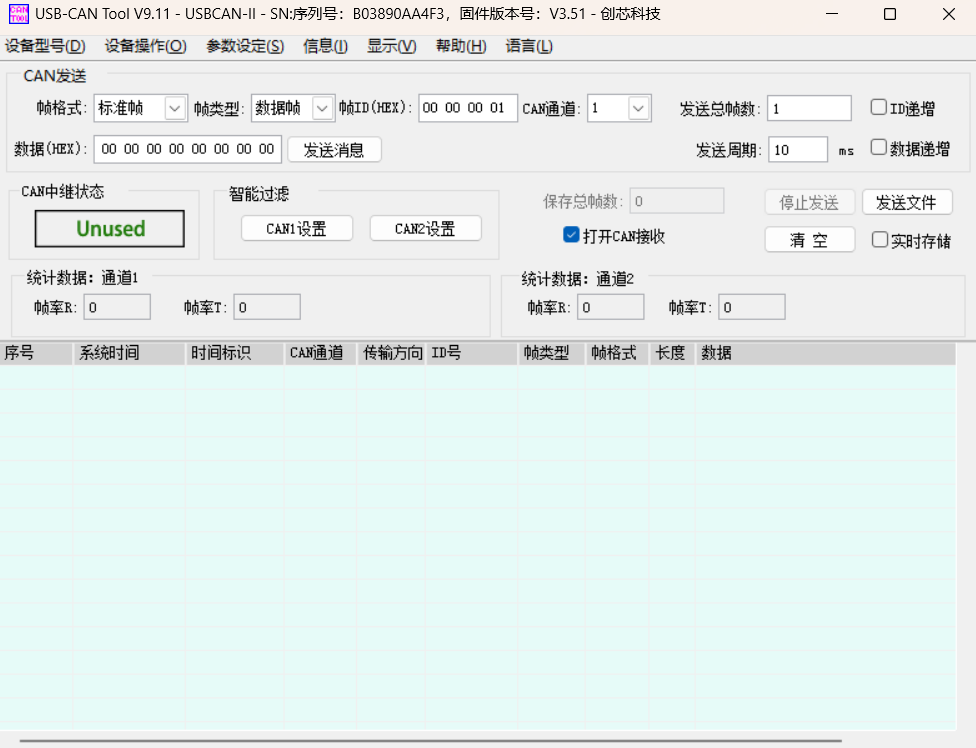
The window title bar displays the software version, device type, serial number, and firmware version once opened (values in the screenshot are examples; you can also change the UI language from the 语言(L) menu).
- Launch USB-CAN Tool.
- Select Device Type > USB-CAN2.0 (
设备型号 > USB-CAN2.0). Because CANalyst-Ⅱ is a dual-channel interface, do not select the single-channelUSB-CANoption. - Select Device Operations > Start Device (
设备操作 > 启动设备). - Configure
CAN1andCAN2in the startup dialog and start the device. - Check that the window title bar displays the device model, serial number, and firmware version, confirming that the interface opened cleanly.
Channel Parameters
| Parameter | Recommended Setting | Notes |
|---|---|---|
Bitrate (波特率) | Match target bus exactly | Common rates include 125, 250, 500 kbit/s, and 1 Mbit/s. |
Mode (工作模式) | Normal (正常模式) | Use Normal mode for active Tx/Rx; Listen-only mode receives without acknowledging frames. |
CAN Channel (CAN通道) | CAN1 or CAN2 | Parameters for CAN1 and CAN2 are independent and configured separately. |
Acceptance Filter (接收过滤) | Receive All for initial tests | Narrow down by CAN ID only after baseline communication is verified. |
Receive Frames
The message table in the lower half of the main window records the sequence number, system time, hardware timestamp, CAN channel, direction (Receive / Send), CAN ID, frame type, frame format, DLC, and data bytes. In the example below, green dots indicate frames received on CAN2 and red dots indicate frames transmitted from CAN1.

Transmit Frames
In the CAN Transmit (CAN发送) panel near the top of the window, configure:
- CAN Channel (
CAN通道): Select the physical channel wired to your bus (1forCAN1or2forCAN2). - Frame Format (
帧格式): Choose Standard Frame (标准帧) or Extended Frame (扩展帧). - Frame Type (
帧类型): Choose Data Frame (数据帧) for normal payload testing. - Frame ID (HEX) (
帧ID(HEX)): Enter the hexadecimal identifier (0x000–0x7FFfor standard frames,0x00000000–0x1FFFFFFFfor extended frames). - Data (HEX) (
数据(HEX)): Enter0–8space-separated hexadecimal bytes, such as01 02 03 04 05 06 07 08. - Total Frames (
发送总帧数): Set to1for an initial single-frame check (-1transmits continuously—use with caution on live networks). - Send Interval (
发送周期): Set the period inmswhen sending multiple frames. - Click Send Message (
发送消息) and verify the outgoing direction and payload in the message table.

The example above transmits a single 8-byte standard data frame with ID
0x0001onCAN1with a10 msinterval setting.